Monday, June 30, 2014

Open a menu link in new window

In Drupal clicking on the menu links will open in the same window. if we want to open the menu links in new window or new tabs, use 'hook_menu_link_alter',

eg:
  1. function mymodule_menu_link_alter(&$item) {
  2.     if ($item['link_path'] == 'node/10') {
  3.       $item['options']['attributes']['target'] = '_blank';
  4.     }
  5. }

Monday, April 7, 2014

Send a notification mail to custom mail id on user registration

When a user registered a notification mail sent to that users mail id when it is set to admin approval is required. If you want to send a notification mail to the admin mail or a custom mail do the following,


Go to /admin/config/system/actions. In the section "Create an advanced action" choose "send an email" and click on "create". It takes you to a page where you need to enter a recipients email address (Enter the Admin email or your custom email address here), subject and Message, then click save.


Now go to /admin/structure/trigger/user (if you not enabled Trigger module please enable it). In the Section "Trigger: After creating a new user account" Choose "Send e-mail" in the select box. Click Assign.

Saturday, March 15, 2014

Alter username in drupal when using email registration

The username field in drupal registration form in not needed when we add our custom fields to capture user name, like First name, Last name,. . So to remove the username field from registration form i used the email_registration module. This module not only remove the username field from registration form but also gives us the feature to login using either username or email address. The problem when using email registration is, a username is generated and assigned based on the username part of the email address.
i.e., if my email id is chris@example.com, my username is set to chris. It is ok when the name is reasonable one. If the email is like iam123@example.com, the username is set to iam123 which is so annoying.

So to change the username displayed for user drupal gives us function hook_username_alter.

  1. function your_module_username_alter(&$name, $account) {
  2.     $user = user_load($account->uid);
  3.     if (!empty($user->field_first_name['und'][0]['value']) && !empty($user->
  4. field_last_name['und'][0]['value'])) {
  5.         $name = $user->field_first_name['und'][0]['value'] ." " . $user->
  6. field_last_name['und'][0]['value'];
  7.     }
  8.     else {
  9.         $name = $user->mail;
  10.     }
  11. }

Wednesday, January 29, 2014

Rename '- None -' option from select list in a webform

When we creating a webform with select options, it gives the list with our options and '-None-' as the default empty value. If i choose it as a mandatory field it changes to '-Select-'. Recently a client of mine wants me to rename the '-None-' as '-Please Select-'. There is no way you can do that with the webform module. There comes an idea of implementing hook_form_alter.

  1. function yourmodule_form_alter(&$form, &$form_state, $form_id) {
  2.   if ($form_id == 'webform_client_form_your_webform_id') {
  3.       $form['submitted']['component_name']['#default_value'] = '';
  4.       $form['submitted']['component_name']['#empty_value'] = '';
  5.       $form['submitted']['component_name']['#empty_option'] = '- Please Select -';
  6. }

Thats it!!

Monday, July 29, 2013

Create a Slideshow in Drupal

Required Contrib Module:


We need a file that contains a JQuery slideshow script. This will need to be uploaded manually.


  • Click the Download the Cycle Plugin link
  • Download the file which will be called jquery.cycle.all.js

  • Browse to /sites/all
  • Create a folder called /libraries/ so that the path is /sites/all/libraries/
  • Create a folder called /jquery.cycle/ so that the path is /sites/all/libraries//jquery.cycle/
  • Upload the jquery.cycle.all.js file into that last folder


We're going to create our slideshow using Views
  • Go to Structure -> Views -> Add new view
  • Check Create a block
  • Choose Slideshow for the Display format
  • Click Continue and Edit


on the next screen
  • Click add next to Fields

  • Search for Image and select it


  • Search for Global: View result counter and select it

  • Click Apply (All displays)
  • Uncheck Create a label for Image

  • Set the Image style to Large(or our custom image style)
  • Check Exclude from display for Global: View result counter

  • In the Format area click settings next to Slideshow

  • Scroll down to the cycle options
  • Check the box Pager under Bottom Widgets
  • Select Global: View result counter as the Pager fields.
  • Click Apply (All displays)


Only Promote contents to appear on Slideshow
  • Click add next to Filter Criteria
  • Search for Promoted to front page and select it
  • Click on Yes under Promoted to front page


Thursday, July 18, 2013

Setting a Multilingual Site in Drupal


Required Contrib Modules:

Modules to be installed
  • Content Translation (core)
  • Locale(Core)
  • Localization Update
  • Block Languages
  • Field Translations
  • Internalization
  • Menu Translation
  • Multilingual Content
  • Multilingual Select
  • String Translation
  • Synchronize Translations
  • Taxonomy Translations
  • Translation Redirect
  • Translations Sets
  • Variable translations
  • Variable
  • Variable admin
  • Variable Realm
  • Variable Store


Now we can see four new options added in Region and Languages

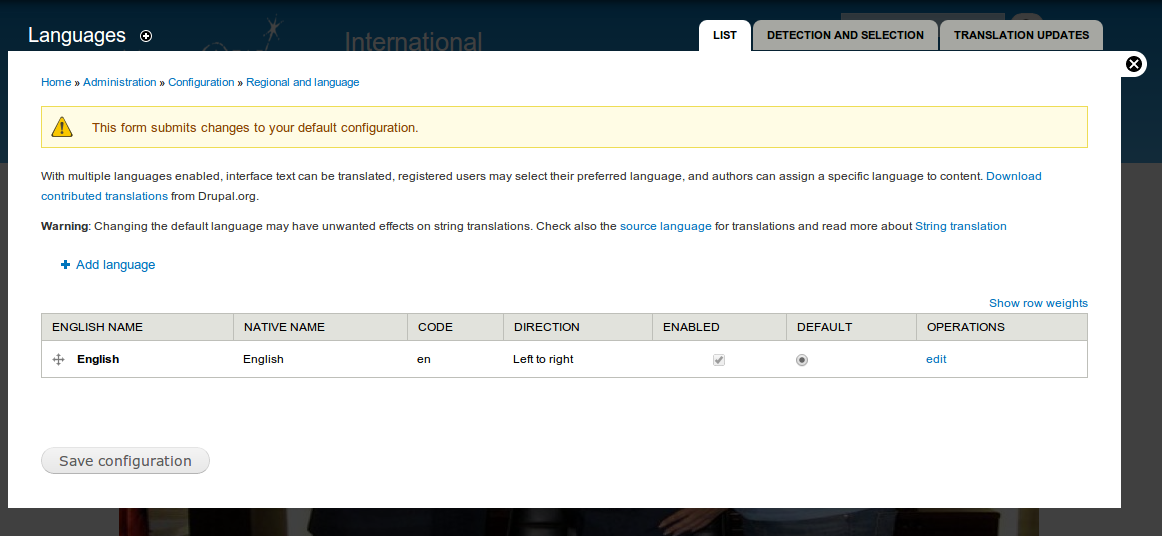
  • Languages
  • Translate Interface
  • Multilingual Settings
  • Translation Sets

For adding a new Language (https://drupal.org/node/21145)

  • Configurations -> Region and Languages -> Languages -> Add Language
  • Choose the language we want and click add language.
  • Now this will import the translation from Drupal Server


Define how to decide which language is used to display page elements (https://drupal.org/node/1497176)

  • Configurations -> Region and Languages -> Languages -> Detection and Selection
  • Enable URL


Where translation files will be stored

  • Configurations -> Region and Languages -> Languages -> Translation Updates
  • In Store downloaded files give the paths as sites/all/translations


Define Translatable text formats
  • Configurations -> Region and Languages -> Multilingual Settings -> Strings
  • Enable all three text formats (Optional)


To hide the translations link from contents
  • Configurations -> Region and Languages -> Multilingual Settings -> Node Options
  • Enable Hide content translation links


Enable translations for Content types
  • Structure -> Content types -> Article ->Edit
  • Under Publishing Options -> Multilingual Support,  choose Enabled, with translation
  • Save it come again to this page
  • Under Multilingual Settings -> Extended language options, enable Require language (Do not allow Language Neutral) only.


After all these steps, we can see a new tab called Translate appears on the top of the contents. we can translate the contents from here.

To switch between the language we need to enable Language switcher block in the blocks area. By using this switcher we can easily switch between the languages.